Getting Started with ZezoPay
Payment gateway into your application
ByNaresh Dhamu
Last updated:February 03, 2025
Welcome to ZezoPay! This guide will walk you through the steps to set up ZezoPay, authenticate your API requests, and integrate the payment gateway into your application.
Step 1: Create an Account
First, sign up for a ZezoPay account on our website. After signing up, you will be able to generate your API Key to authenticate your requests.
- Go to the ZezoPay Sign-Up Page
- Fill in your details and create an account
- Go to your Dashboard to generate your API Key
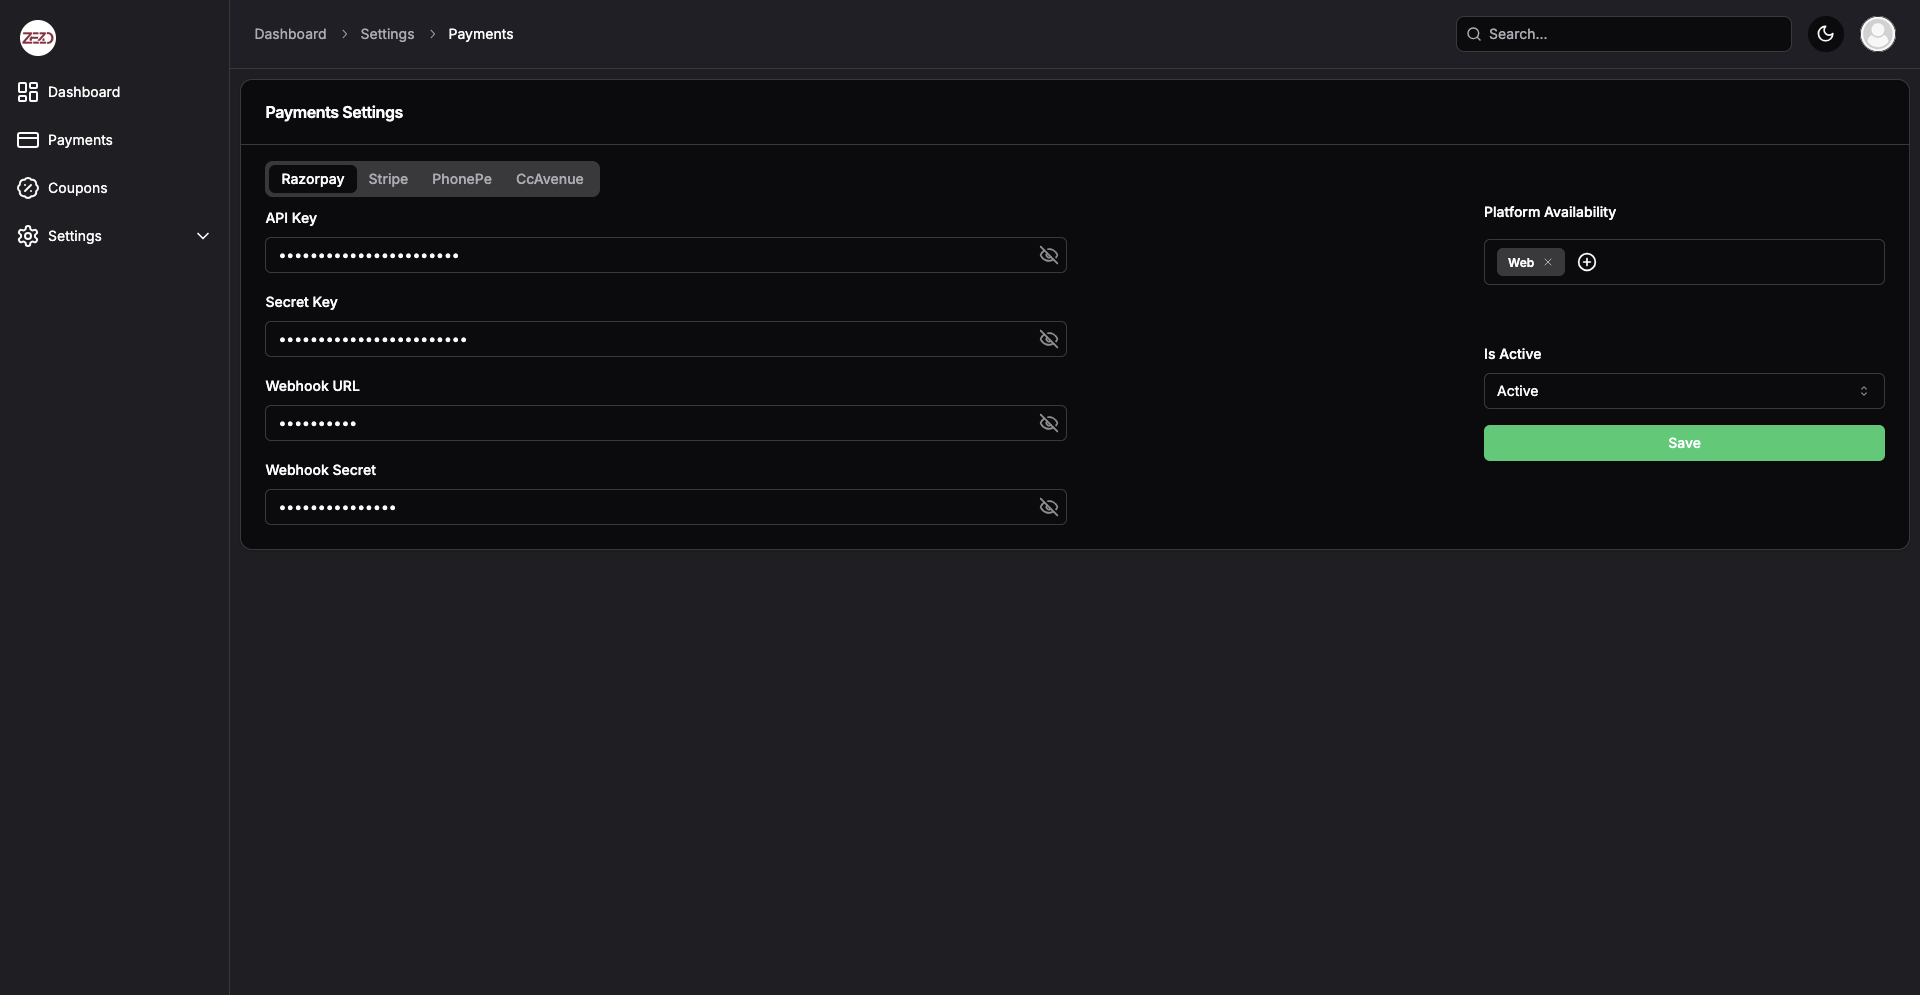
Step 2: Store Your Provider's Secret
After obtaining your API Key, securely store your provider's secrets.
- Go to the ZezoPay Settings > Payments
- For Razorpay, go to the Razorpay Dashboard and generate your secret key
- For Stripe, go to the Stripe Dashboard and generate your secret key
- Save the secrets securely in the ZezoPay settings page
Example of Saving the Secret
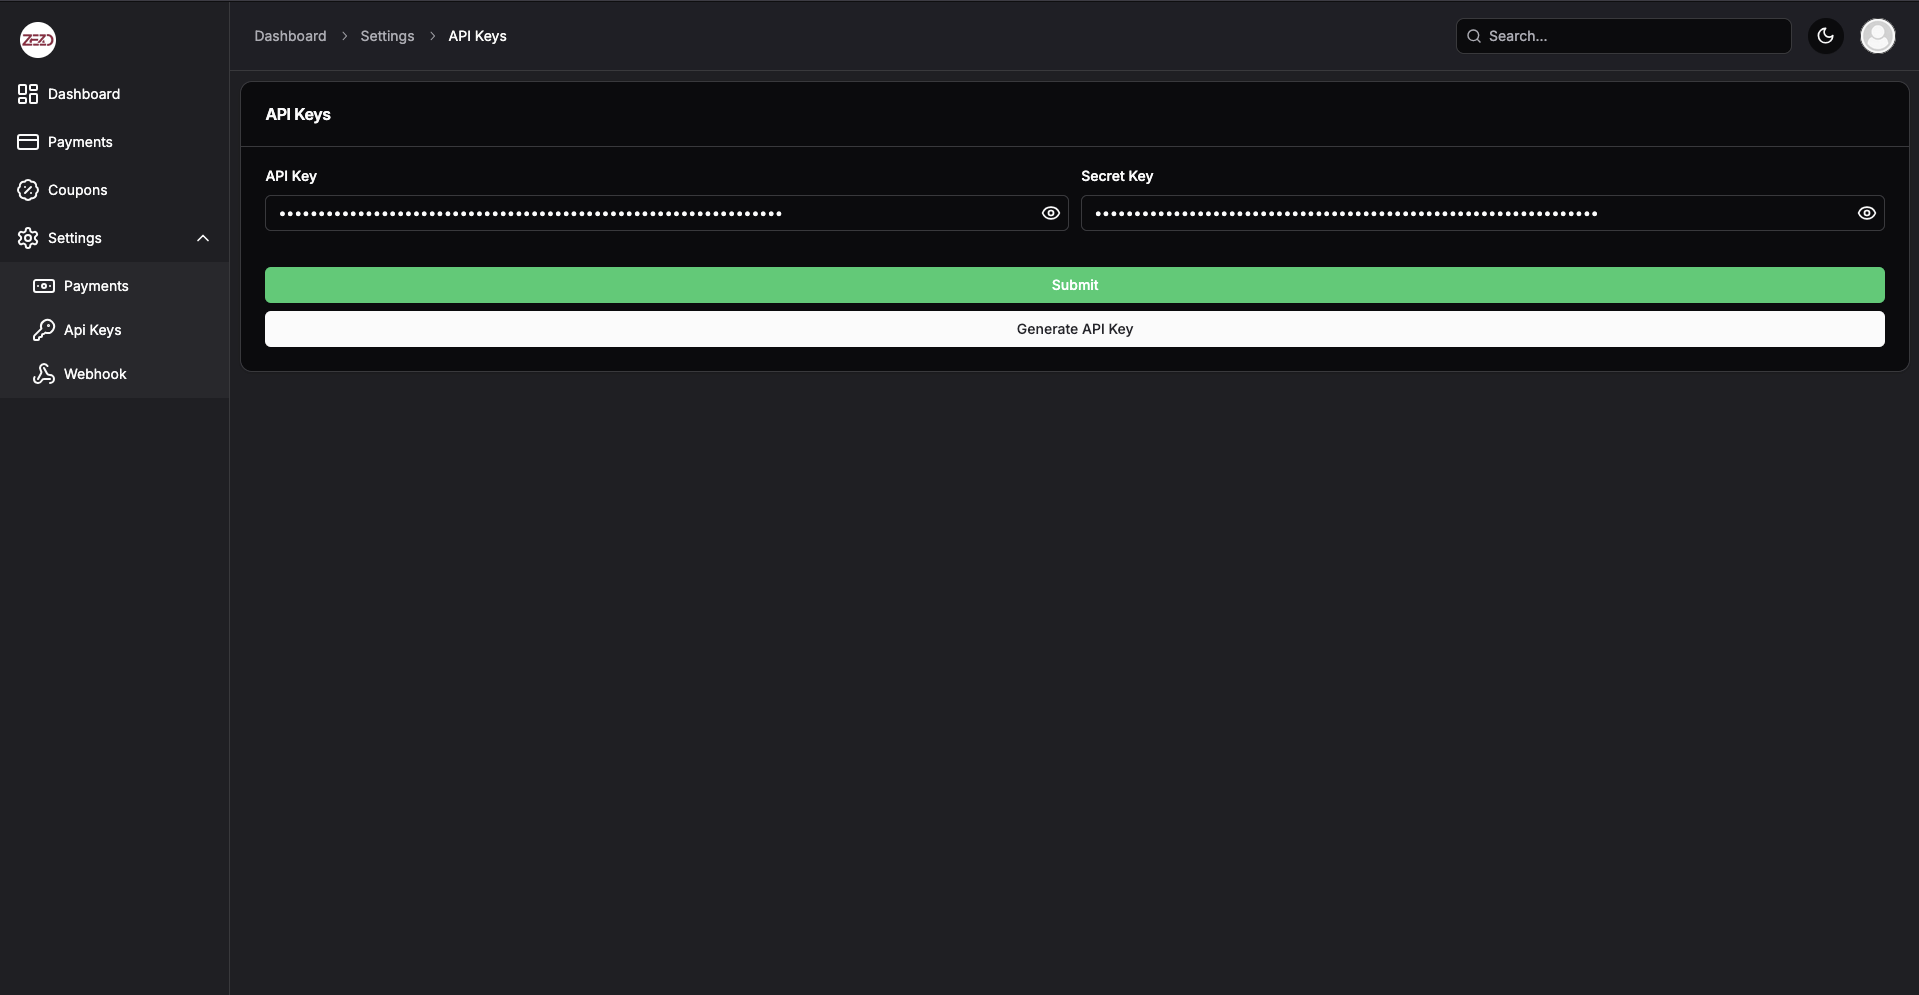
Step 3: Generate API Key or Secret Key in ZezoPay
To generate your API Key or Secret Key for ZezoPay, follow these steps:
- Go to the ZezoPay API Keys Page.
- In the API Keys section, click on the Generate API Key or Generate Secret Key button to create your keys.
- Copy the generated key and securely store it.
- Save the secret by clicking the submit button.
Example of Saving the ZezoPay Secret
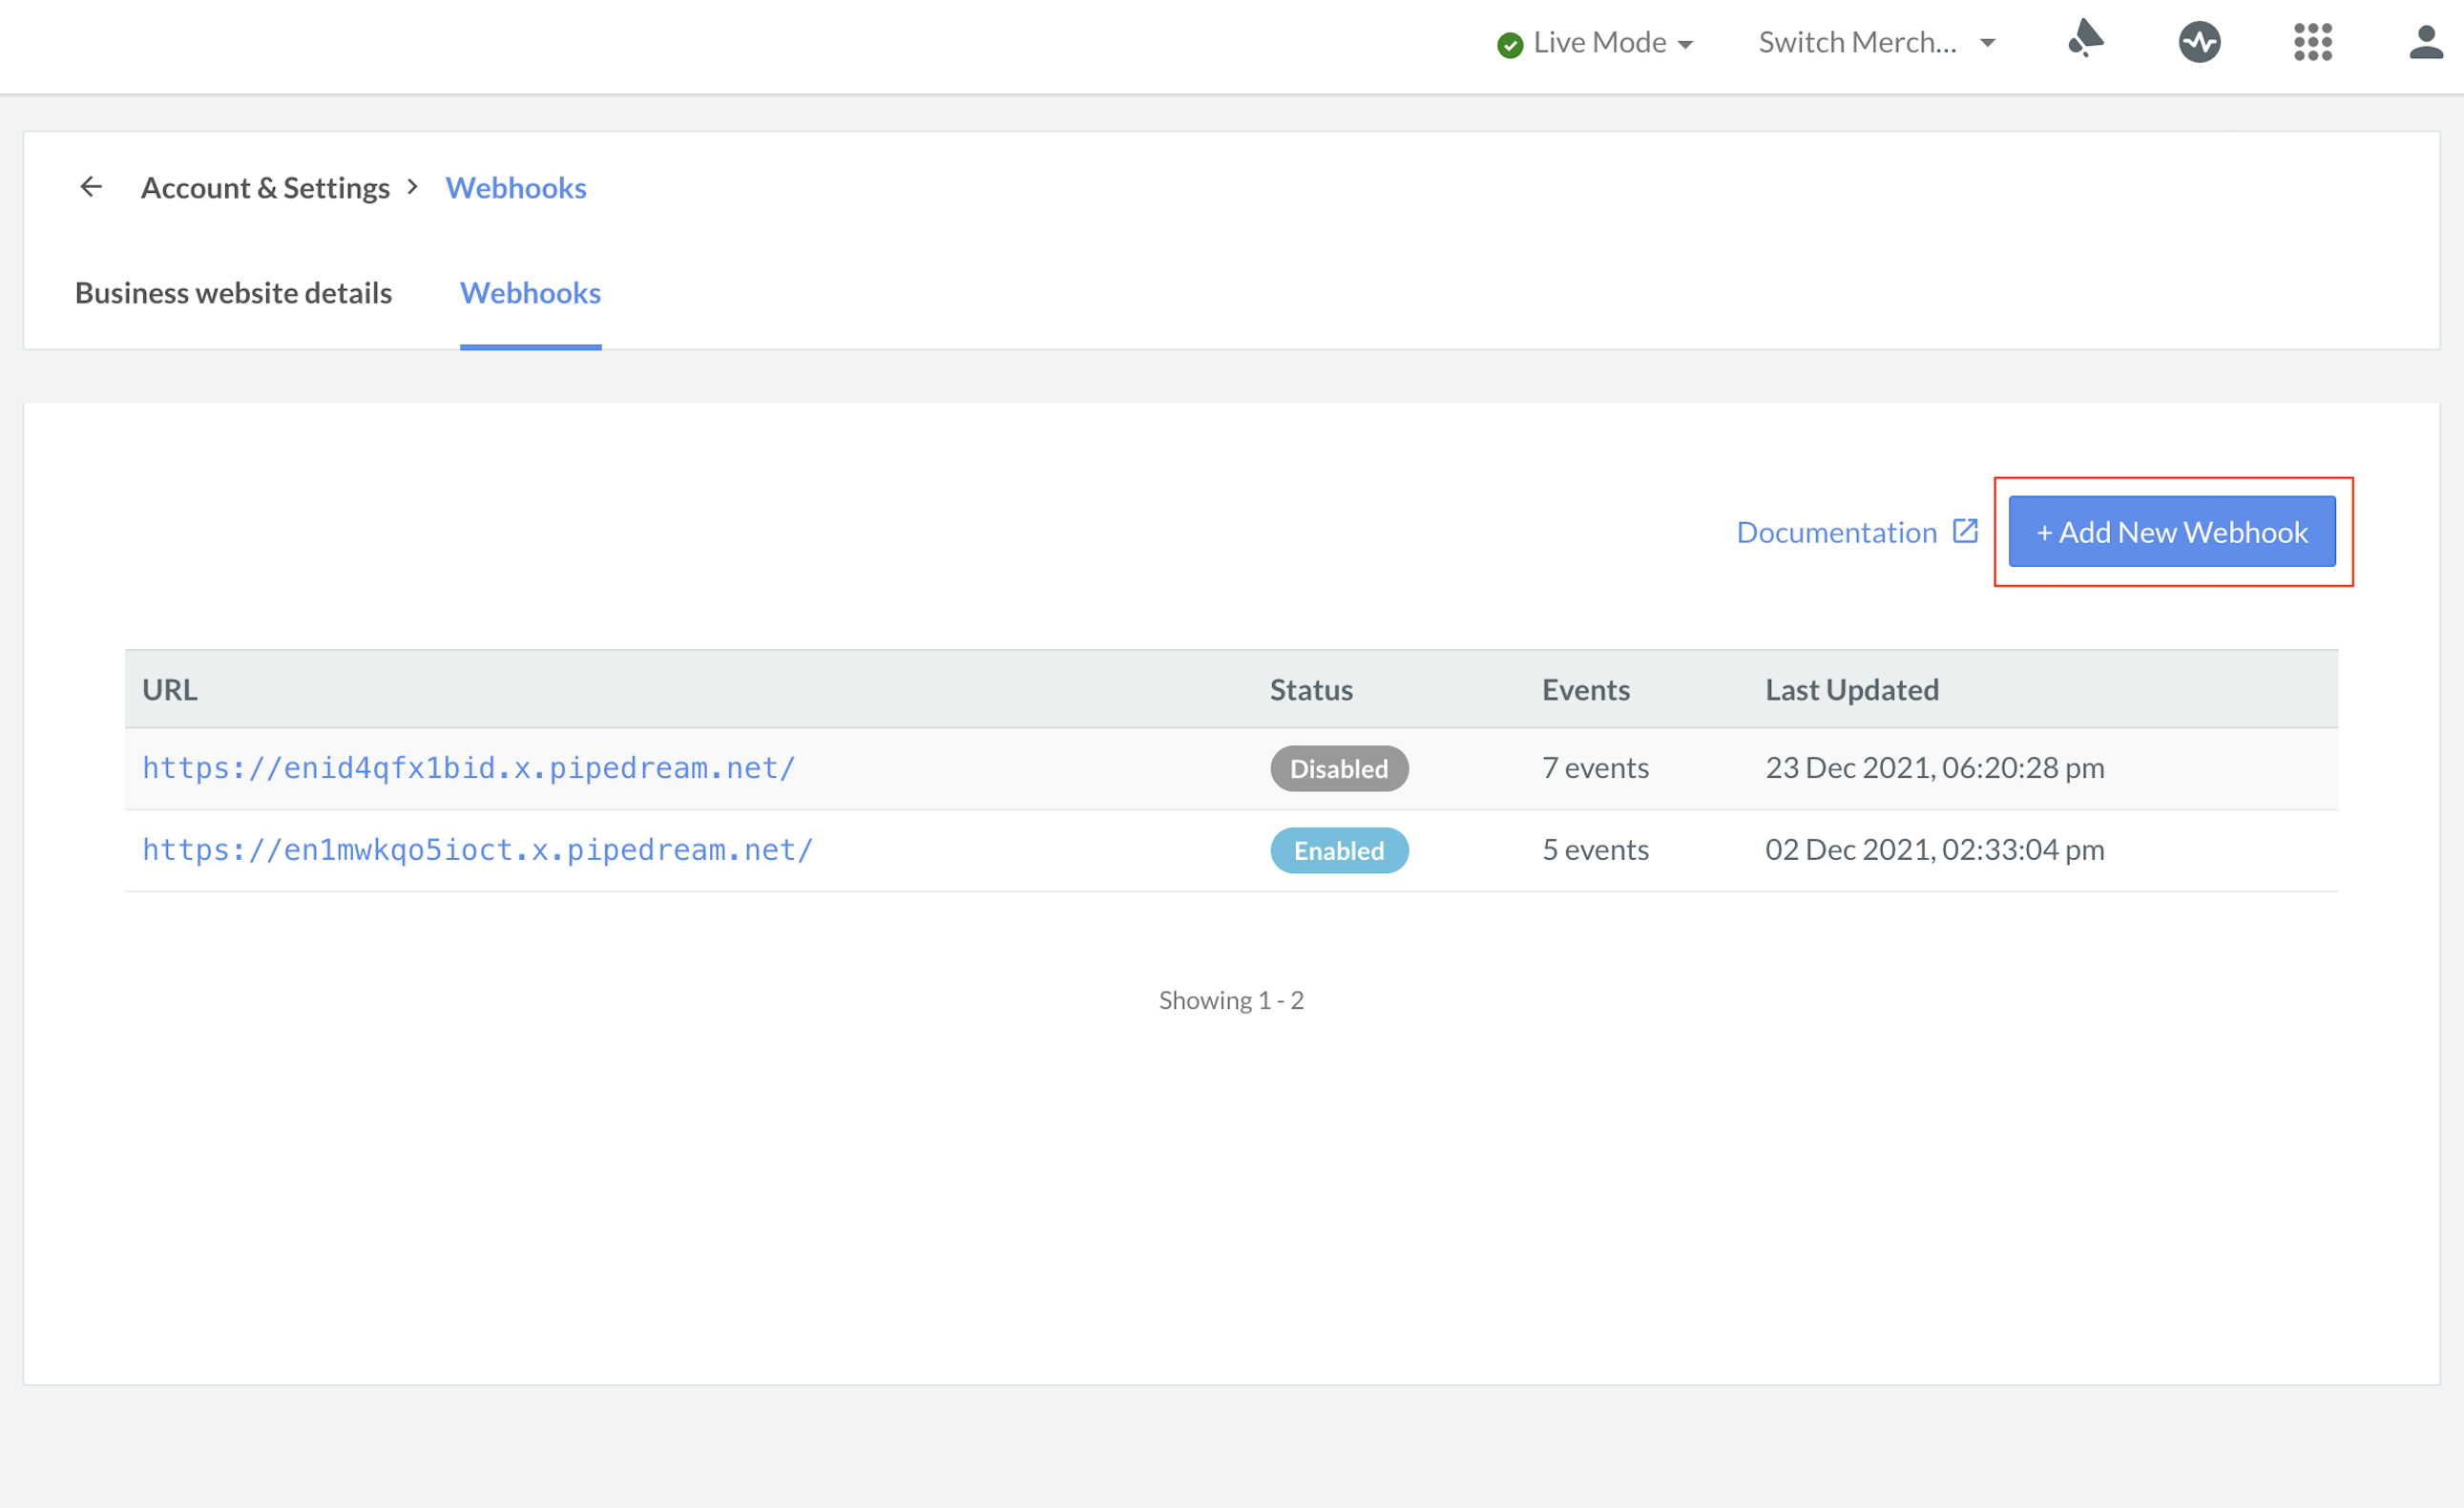
Step 4: Configure Razorpay Webhook
Webhook ek HTTP callback hai jo payment gateway (Razorpay) se real-time notifications receive karne ke liye use hota hai, jaise payment success, failure, refund, etc.
Steps to Add Razorpay Webhook:
-
Login to Razorpay Dashboard:
- Go to the Razorpay Dashboard and log in with your credentials.
-
Navigate to Webhooks:
- In the Razorpay Dashboard, click on Settings in the sidebar.
- Under the API Keys section, click on Webhooks.
- Click on the Add Webhook button.
-
Set the Webhook URL:
- In the Webhook URL field, enter the following URL for ZezoPay:
This is the URL where Razorpay will send the webhook notifications.https://payapi.zezo.in/api/v1/payments/verify/razorpay
- In the Webhook URL field, enter the following URL for ZezoPay:
-
Add Razorpay Webhook Secret Key:
- Go to the ZezoPay Dashboard and log in.
- Navigate to Settings > Payments.
- Under the Razorpay Settings, find the Webhook Secret field.
- Enter your Webhook Secret Key in this field and click Save.
-
Select the Events to Subscribe:
- Razorpay provides multiple events you can subscribe to, like
payment.captured,payment.failed,payment.authorized, etc. - Choose the events based on the notifications you want to receive. Typically, you would subscribe to:
- payment.captured: Payment successfully captured.
- payment.failed: Payment failed.
- refund.created: A refund has been initiated.
- Razorpay provides multiple events you can subscribe to, like
-
Save Webhook:
- After selecting the desired events, click Save to add the webhook.
-
Verify Webhook Signature:
- Razorpay will send a signature with each webhook notification for security.
- You need to verify the signature to ensure that the request is from Razorpay. Use the Razorpay Webhook Secret Key to verify the signature.
- To get the Webhook Secret, go to the Webhook Settings page in the Razorpay Dashboard and click Show Secret.
- Add the following code snippet to verify the webhook signature:
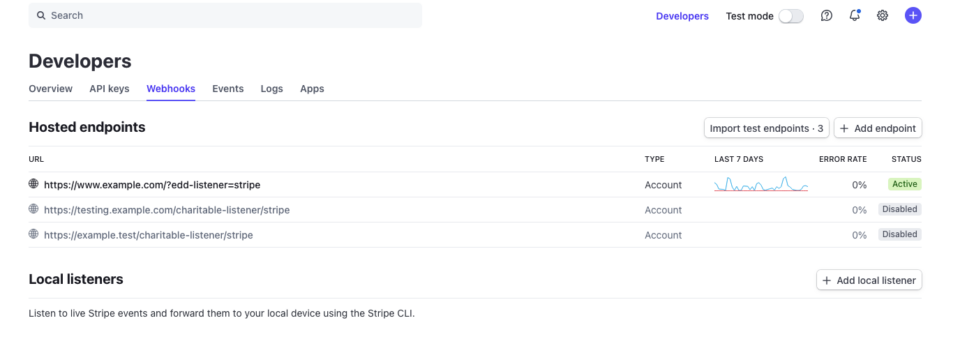
Step 5: Configure Stripe Webhook
Webhook ek HTTP callback hai jo payment gateway (Stripe) se real-time notifications receive karne ke liye use hota hai, jaise payment success, failure, refund, etc.
Steps to Add Stripe Webhook:
-
Login to Stripe Dashboard:
- Go to the Stripe Dashboard and log in with your credentials.
-
Navigate to Webhooks:
- In the Stripe Dashboard, click on Developers in the left sidebar.
- Under the Webhooks section, click on Add endpoint.
-
Set the Webhook URL:
- In the Endpoint URL field, enter the following URL for ZezoPay:
This is the URL where Stripe will send the webhook notifications.https://payapi.zezo.in/api/v1/payments/verify/stripe
- In the Endpoint URL field, enter the following URL for ZezoPay:
-
Select Events to Subscribe:
- Stripe provides multiple events you can subscribe to, such as
payment_intent.succeeded,payment_intent.payment_failed,charge.refunded, etc. - Choose the events based on the notifications you want to receive. Typically, you would subscribe to:
- payment_intent.succeeded: Payment successfully completed.
- payment_intent.payment_failed: Payment failed.
- charge.refunded: A charge has been refunded.
- Stripe provides multiple events you can subscribe to, such as
-
Save Webhook:
- After selecting the desired events, click Add endpoint to save the webhook.